
Crafting your own ceramic art infuses personality and flair into any space. A DIY ceramic painting project offers a perfect opportunity to unleash creativity while creating something beautiful and functional. Whether you’re looking to personalize homeware or create a unique gift, learning the art of ceramic painting can be immensely rewarding.
Preparing your workspace and materials
Gather Your Supplies: Before starting, ensure you have all the necessary materials. You will need unpainted ceramics (often referred to as bisque), ceramic paints, brushes of various sizes, a clear sealant, a palette for mixing colors, water for cleaning brushes, and old newspapers or a tablecloth to protect your work surface.
Choose an Optimal Workspace: Select a clean, well-lit area with plenty of space. Natural light is perfect for seeing the true colors of your paint and for helping you to focus on the intricate details of your work.
Safety Comes First: Since you’re working with paints and potentially harmful substances, always work in a ventilated area. Don’t forget to wear protective clothing or an apron to protect your clothes, and gloves if you have sensitive skin.
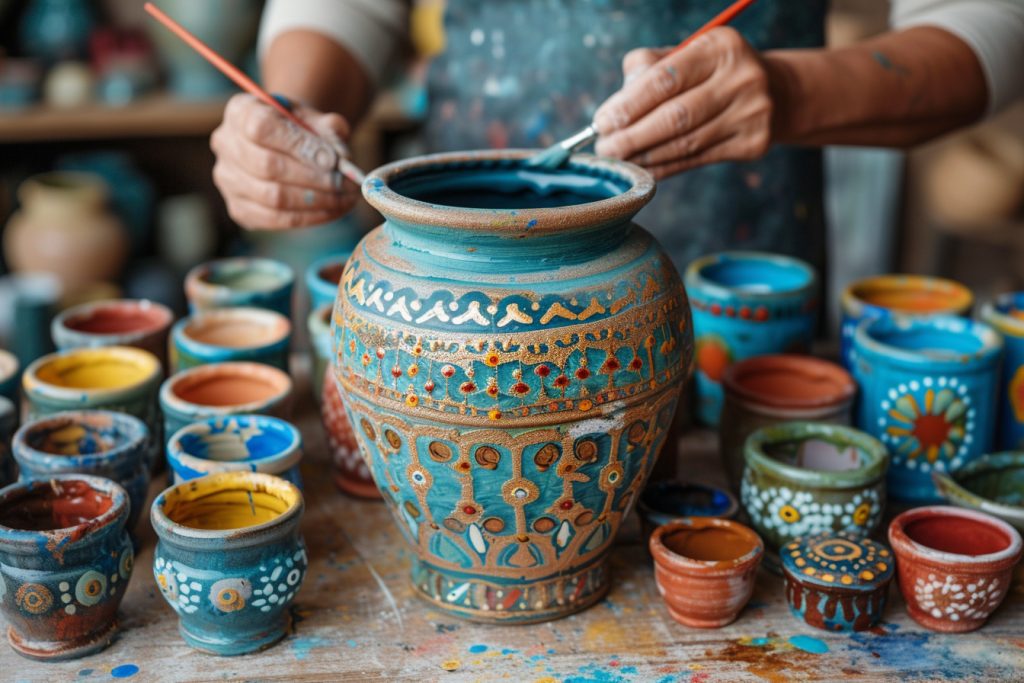
The ceramic painting process
Step 1: cleaning the bisque
The very first step in DIY ceramic painting is to prepare your bisque. Remove any dust or particles by wiping the ceramic piece with a damp sponge or cloth, ensuring a clean canvas for your artwork.
Step 2: conceptualizing your design
Visualize your end goal. What kind of design are you after? Bold and abstract? Fine and detailed? Sketching your design on paper can be a helpful way to envisage how it might translate onto a 3D surface.
Step 3: outlining your design
Gently sketch the outlines of your design onto the bisque using a pencil. The faint lines will guide you as you paint but can be easily erased or painted over if you change your mind.
Step 4: applying the base coat
Now, begin painting the base coat on your ceramic piece. This initial layer sets the stage and provides a unifying background for your design. Ensure that this coat is even and smooth, as it will affect the outcome of subsequent layers.
Step 5: painting with colors
Once the base coat is dry, begin applying your primary colors. With lighter colors typically requiring more than one coat for full opacity, patience is key. Let each coat dry before applying the next to avoid smudging.
Step 6: adding details and texture
The next phase is to bring your design to life by adding details. Use finer brushes for intricate work such as outlines, patterns, or text. If you want to add texture, sponges or stippling techniques can create unique effects.
Step 7: sealing your masterpiece
After the paint has thoroughly dried, it’s essential to apply a clear sealant. This not only protects your painting but also enhances the colors, giving your artwork a glossy and professional finish.
Advanced techniques and tips
Layering and Blending: Mastering the technique of layering and blending your paints can add depth and realism to your design. Take the time to gently blend the edges of different colors together for a seamless look.
Sgraffito: This technique involves scratching through a top layer of paint to reveal areas of the underlying layer, adding texture and intricacy to your piece.
Dry Brushing: Great for creating a worn or antique look, dry brushing involves using a brush with very little paint to lightly apply color to the raised surfaces of your design.
Themed Creations: Aligning your designs with upcoming holidays or seasons adds thematic charm to your creations, perfect for gift-giving or seasonal decorating.
Personalized Pieces: Should your ceramic painting endeavor be a means of crafting customized gifts, integrate elements that reflect the recipient’s personality or interests within your design.
Final touches and care
Quality Over Quantity: Take your time with every step to ensure the finest finish. Rushing might lead to oversights that can detract from the beauty of the final product.
Caring for Your Ceramic Art: Once your piece is complete and sealed, it’s vital to handle it with care. Although the sealant offers protection, painted ceramics are best gently hand-washed rather than placed in a dishwasher.
Longevity: Store your ceramic creations in places where they are less likely to be bumped or dropped. Careful handling and placement will help your work last for years to come.
Practice Makes Perfect: Each ceramic painting project provides insights and experiences that build your skill level. Embrace the trial-and-error process, as it is essential for growth and mastery in this artistic domain.
Reflections on personal development through diy ceramic painting
Embarking on DIY ceramic painting projects is not merely about producing an item, but rather about the growth experienced during the creative process. This art form requires both attention to detail and an ability to visualize the end product, skills which translate beneficially into various aspects of life. The capacity for patience, refinement of fine motor skills, and the nurturing of a creative eye all contribute to personal development.
Embrace the learning process as much as the painting itself, as each ceramic piece becomes a testament to your burgeoning artistic expertise. With dedication and creativity, stunning results await. Remember, DIY ceramic painting is as much about expressing individuality as it is about crafting something beautiful to behold. As your brush strokes give life to clays and colors, so too does the process enrich your own life with a sense of accomplishment and fulfillment.
Final words

Ultimately, DIY ceramic painting is a journey of self-expression through art. It intertwils meticulous care with an exuberance for color and form. By following these detailed steps and allowing yourself the freedom to experiment, you can transform ordinary ceramics into extraordinary works of art. Whether you are a seasoned artist or a beginner, the canvas of ceramics holds endless possibilities. So grab your brushes, prepare your palette, and embark on the fulfilling adventure of DIY ceramic painting.
Happy crafting!


